Webflow and Shopify are both leading platforms in the e-commerce space. By combining their strengths, you can create a visually appealing and highly functional online store.
In this article, we’ll guide you through what Webflow is, the advantages of integrating it with Shopify, and provide a simple, step-by-step process for connecting the two.
We’ll also cover the integration requirements, and common challenges, and help you determine if this integration is right for your business.
What Is Webflow And Why Integrate It With Shopify?
Webflow is a popular website design and development platform that allows users to create visually stunning, responsive websites without writing a single line of code. It offers a user-friendly, drag-and-drop interface along with powerful design tools and customization options.

Webflow empowers designers and marketers to bring their creative visions to life while ensuring that the website is fully functional and optimized for performance.
Integrating Webflow with Shopify brings numerous benefits to e-commerce businesses. Shopify is a leading e-commerce platform that provides everything you need to set up and manage an online store, including payment processing, inventory management, and shipping tools. By connecting your Webflow site with Shopify, you can leverage the strengths of both platforms to create a seamless, engaging shopping experience for your customers.
Some key benefits of integrating Webflow with Shopify include:
- Enhanced design flexibility: Webflow’s design capabilities allow you to create a unique, on-brand look and feel for your online store, setting you apart from competitors using standard Shopify themes.
- Improved user experience: By designing your website in Webflow, you can create a more intuitive, user-friendly navigation and layout, making it easier for customers to find and purchase products.
- Increased customization options: Webflow enables you to add custom features and functionality to your website, such as interactive product displays or personalized recommendations, enhancing the overall shopping experience.
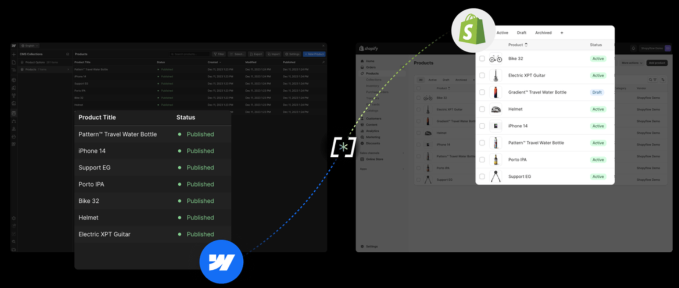
- Seamless data synchronization (with appropriate tools): Integrating Webflow with Shopify allows for seamless order processing and, when using automation tools like Zapier, ensures product information and inventory levels can be automatically synced between platforms, reducing manual effort and minimizing errors.
- Expanded marketing opportunities: Webflow’s powerful CMS and design flexibility allow you to create highly engaging and visually rich content, such as blog posts or product guides, to attract and retain customers, driving more traffic to your Shopify store with a superior content experience.
Requirements For Webflow Shopify Integration
Before you begin the integration process, ensure that you have the following:
- A Webflow account: You will need a Webflow account to design and host your website. Choose a plan that suits your business needs and budget.
- A Shopify account: Set up a Shopify account and configure your online store settings, payment methods, and shipping options. You can start with our exclusive 3-month Shopify trial at just ₹20/month.
- Webflow Ecommerce plan: To integrate Webflow with Shopify, you must subscribe to one of Webflow’s Ecommerce plans, which include the necessary tools and features for integration.
- Basic understanding of Webflow and Shopify: Familiarity with both platforms will make the integration process smoother and help you troubleshoot any issues that may arise.
Step-by-Step Guide For Webflow Shopify Integration
Follow these steps to successfully integrate your Webflow site with Shopify in 2025:
Set up your Webflow site
Design your website in Webflow, creating the necessary pages, layouts, and content. Ensure that your site is optimized for user experience and adheres to e-commerce best practices.
Step 1. Create a Shopify Buy Button
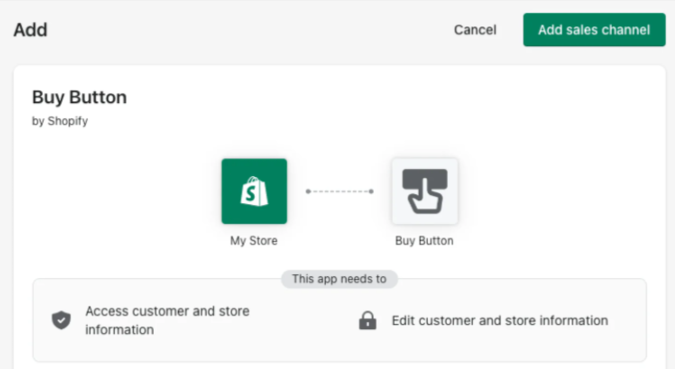
In your Shopify admin, navigate to the “Buy Button” section under “Sales Channels.” Create a new Buy Button and customize its appearance to match your Webflow site’s design.

Step 2. Add the Shopify Buy Button to Webflow
Copy the generated code for the Buy Button from Shopify and paste it into an Embed element in Webflow. Position the Embed element where you want the Buy Button to appear on your site.
Step 3. Connect your Shopify products
In Webflow, create a Collection to store your product information. Add the necessary fields, such as product name, price, description, and image. Populate the Collection with your Shopify product data, either manually or by using an integration tool like Zapier.

Step 4. Set up product pages
Design your product pages in Webflow, incorporating the product information from your Collection. Use the Shopify Buy Button Embed element to display the “Add to Cart” button on each product page.
Step 5. Configure the shopping cart
Customize the appearance of the Buy Button and its associated Shopify cart settings within your Shopify admin. While Shopify handles the core cart functionality, ensure that the integrated experience from your Webflow site is seamless.
Step 6. Test and launch
Thoroughly test your integrated Webflow-Shopify site to ensure that all features and functionalities work as intended. Once you are confident that everything is working correctly, publish your site and start promoting your products.
Common Challenges Of Integrating Webflow With Shopify
While integrating Webflow with Shopify is generally a straightforward process, there are some common challenges you may encounter:
- Data synchronization: Ensuring that product information, inventory levels, and order details are accurately synced between Webflow and Shopify can be challenging, especially if you have a large number of products or frequent updates.
- Design limitations: Although Webflow offers extensive design capabilities, there may be some limitations when integrating with Shopify. For example, certain Shopify features or elements may not be fully customizable within Webflow.
- Functionality issues: Depending on the complexity of your site and the specific features you want to include, you may face functionality issues during integration. This can include problems with the shopping cart, product variants, or the checkout process.
- Maintenance and updates: As both Webflow and Shopify continue to evolve, you may need to regularly update and maintain your integrated site to ensure compatibility and optimal performance.
Who Should Integrate Shopify With Webflow?
Integrating Shopify with Webflow is particularly beneficial for businesses that:
- Prioritize unique design: If you want your online store to have a distinctive, on-brand look and feel that sets you apart from competitors, integrating Webflow with Shopify is a great choice.
- Require advanced customization: Businesses that need custom features or functionality beyond what is offered by standard Shopify themes can benefit from Webflow’s flexibility and customization options.
- Value seamless user experience: By designing your site in Webflow and integrating it with Shopify, you can create a more intuitive, user-friendly shopping experience that drives conversions and customer satisfaction.
- Have complex content needs: If your e-commerce site requires extensive content, such as detailed product descriptions, blog posts, or guides, Webflow’s content management capabilities can help you organize and present this information effectively.
Suggested Reads:
Conclusion: Integrate Webflow with Shopify For a Smoother Workflow
Integrating Webflow with Shopify is a powerful way to create a visually stunning, highly functional e-commerce website that delivers an exceptional user experience. By leveraging the strengths of both platforms, businesses can enhance their online presence, drive sales, and foster customer loyalty.
While there may be some challenges along the way, the benefits of a successful integration far outweigh the effort required. If your business prioritizes unique design, advanced customization, seamless user experience, and complex content needs, consider integrating Shopify with Webflow to take your online store to the next level.
FAQs
Integrating Webflow with Shopify combines Webflow’s design flexibility with Shopify’s e-commerce features, creating a visually appealing, customizable, and user-friendly online store.
Benefits include enhanced design flexibility, improved user experience, increased customization options, seamless data synchronization, and expanded marketing opportunities.
You’ll need a Webflow account, a Shopify account, a Webflow e-commerce plan, and a basic understanding of both platforms to ensure smooth integration.
The process includes setting up your Webflow site, creating a Shopify Buy Button, adding it to Webflow, connecting your Shopify products, designing product pages, and testing the integration.
This integration is ideal for businesses that need a unique, customizable design, advanced features, a seamless user experience, or have complex content needs.

